Arduino Physics
Section outline
-
-
MicroController Project1. Learn About MicroControllers(small computers - Measure and Control)
2. Learn to Control an Arduino MicroController
3. Use an Arduino to Operate a Sumo Wrestling Robot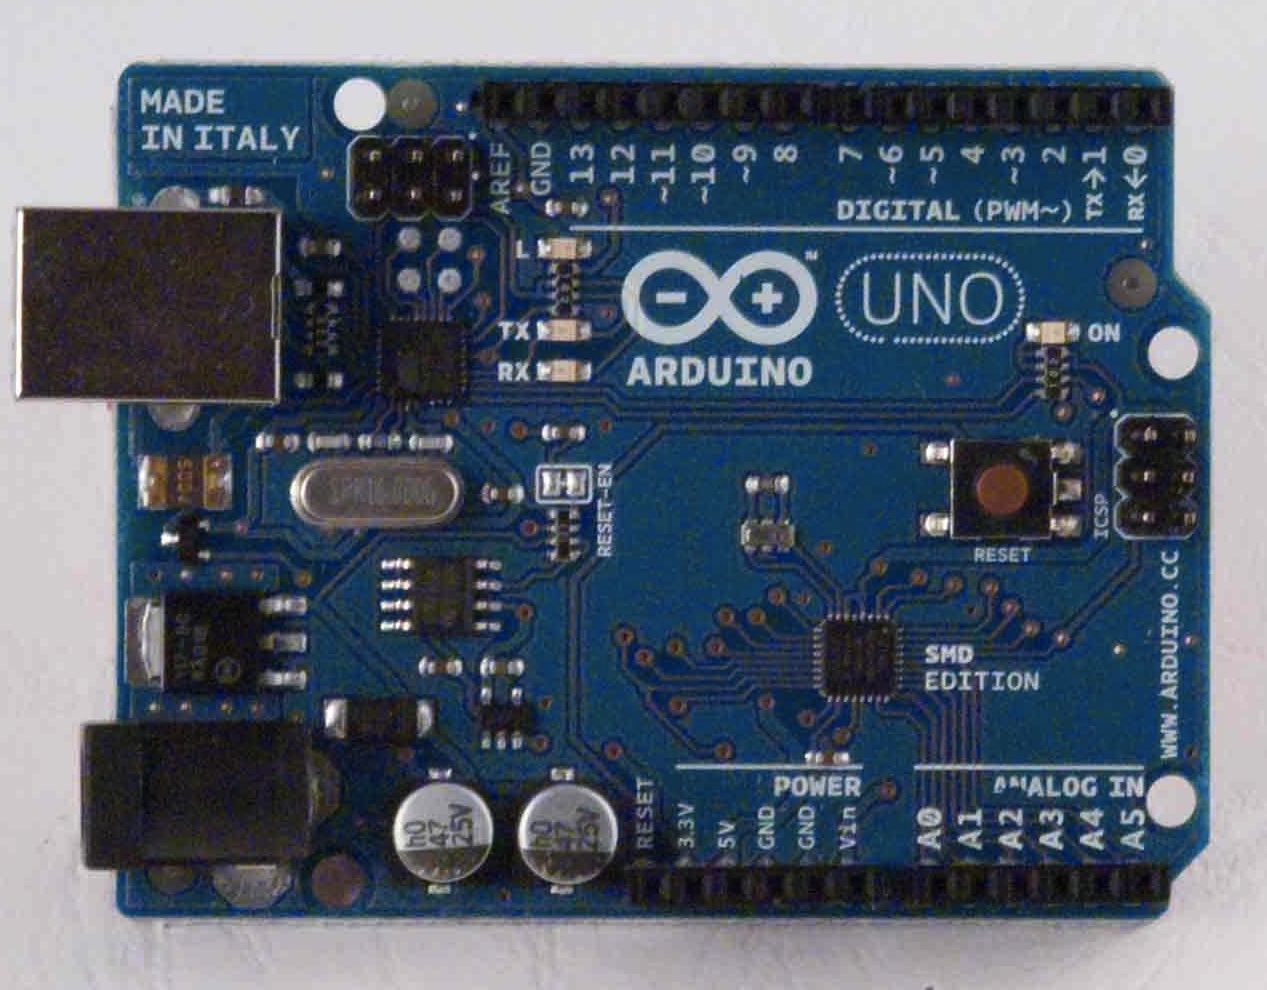
In Class:Comic Strip - Pg 1 - 9Intro to MicroControllers - Mr. Rich
Running your first program (sketch) - Blink
-
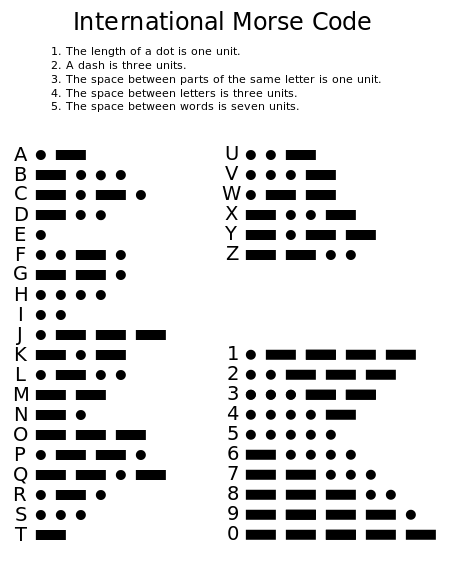
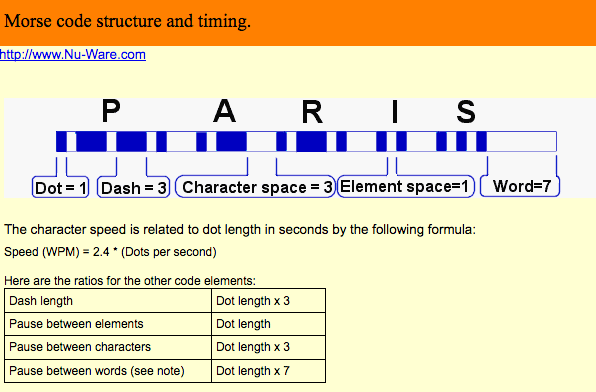
Assignment:With the Blink Sketch as a pattern, write a sketch that sends morse code to pin 13 (LED) of your first, middle and last name.
-
-
-
Assignment #2 -
Be sure you have shared your finished Assignment 1 - SOS & Name
Parts: 1 Breadboard, 1 Red, Yellow, Green LED Stoplight, and at least 6 jumper wires. (1 Red, 1 Black, 4 others)
In Class We'll Discuss:
- CQCQ - Link
-Morse Code to 800 hz - Link
-LEDs and Resistor Codes
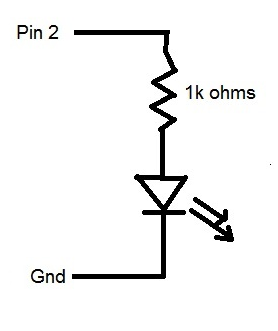
-Calculating Current Limiting resistor values in ohms (Ω) -Ohm's Law V=I R
10mA at 5 Volt, 20mA at 5 Volt, Current at 5 Volts and 220 ohms
** Note: Arduino Digital Pins can safely output a maximum of 40 mA

-Comic Strip Pages 10 - 11 - Wiring LEDs on a breadboard
- Don't let the Smoke Out !!! - Use only prescribed wiring !
- Wire with the Power OFF (USB unplugged)
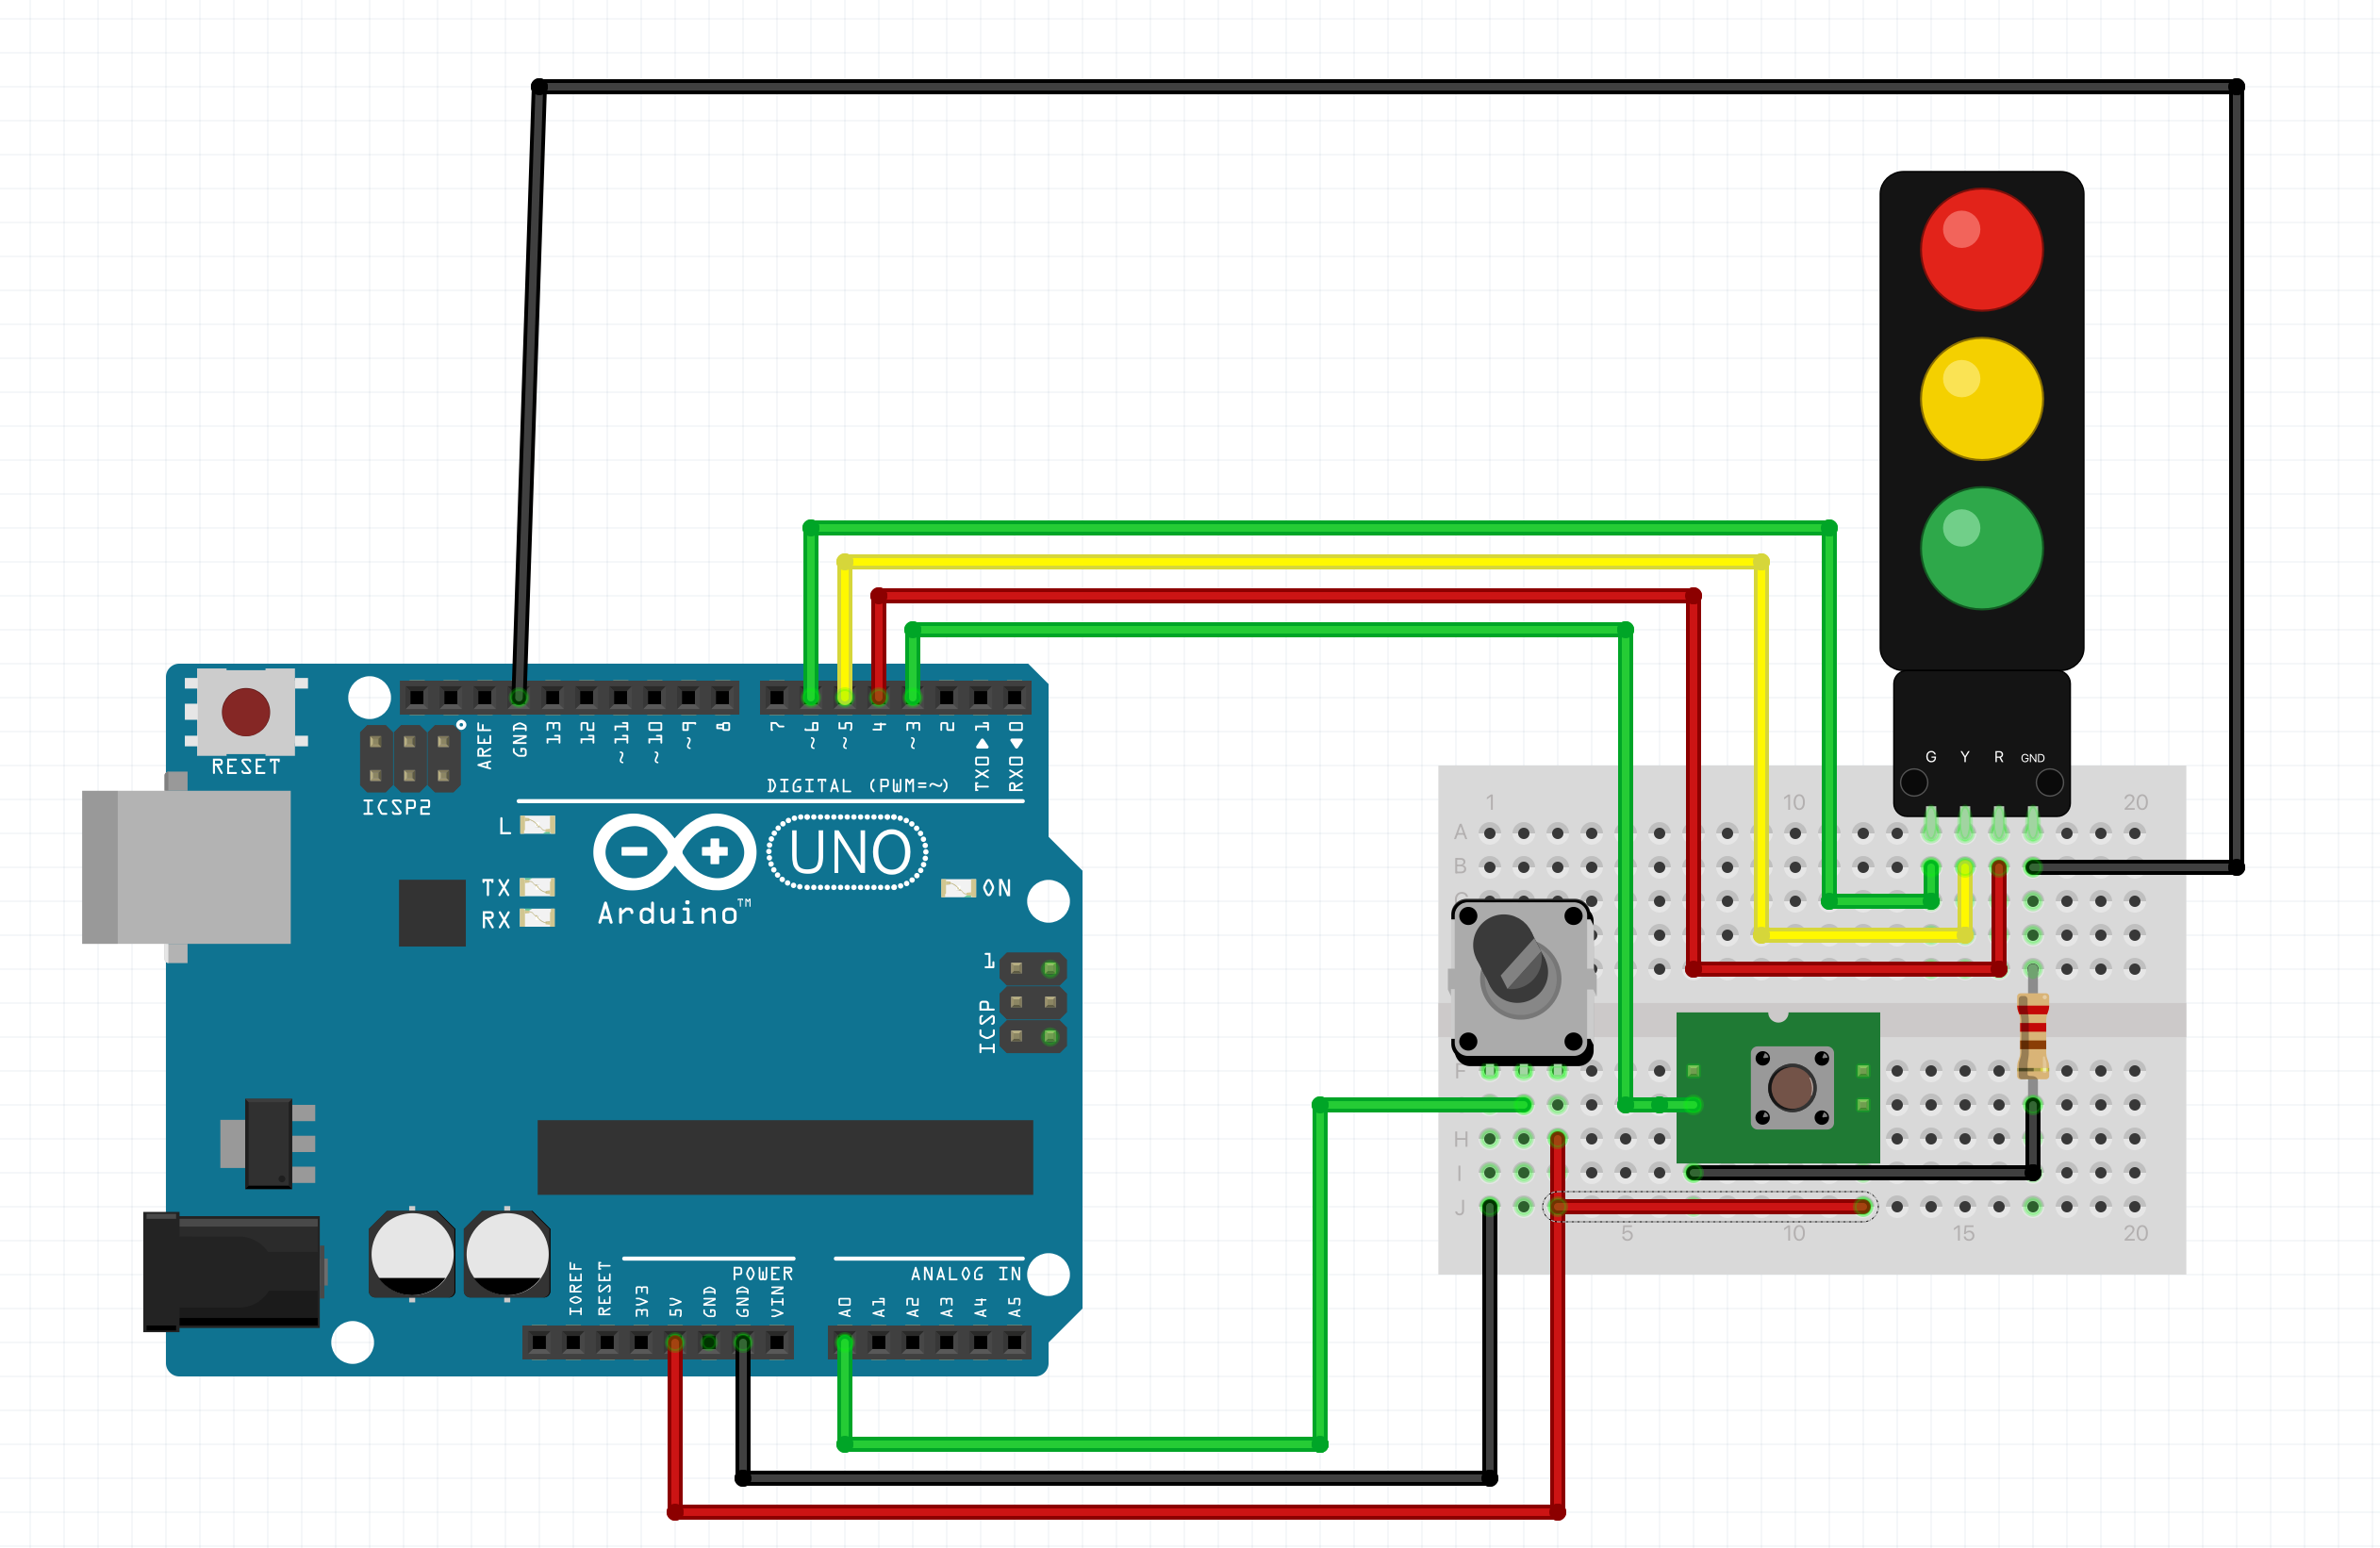
With no Power to your Arduino:Wire 3 LEDs (with 3 Current Limiting Resistors) to Pins 4,5,6
Pin4 to Stoplight Red
Pin5 to Stoplight Yellow
Pin6 Stoplight Green
Gnd to Stoplight Gnd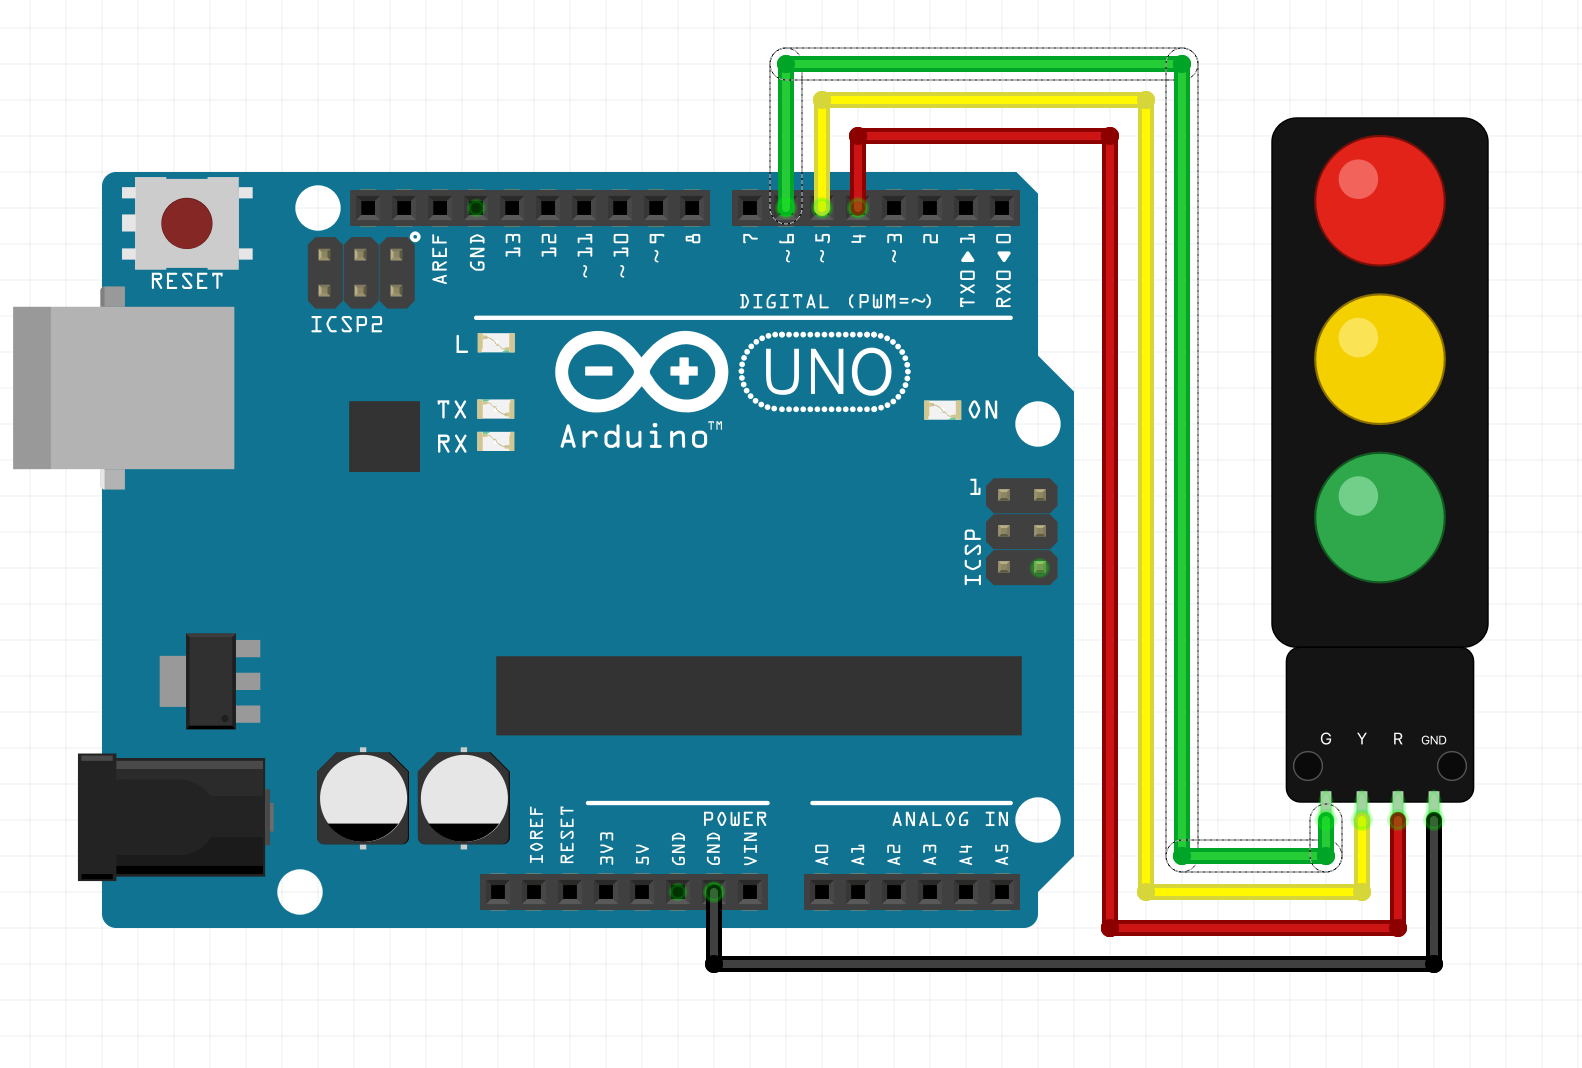
1) Modify Blink to test each LED
2) Write a program to simulate a traffic light.
Green for 10 Seconds
Yellow for 2 Seconds
Red for 5 Seconds
Add comment lines to the top of your program to explain what is wired to the Arduino
-
-
-
Assignment #3
-
Hidden from students:LabeAssignment #3 -
Go over Traffic Signal
Parts: 1k Resistor (brn, blk, red, gold), Potentiometer, Momentary Switch, 6 more wires
Cyborg Cockroach
MIT Cheetahs
LeonardoDemo: Pulsed LED - Fade with Potentiometer
In Class We'll Discuss Comic Strip Page 12 - 14
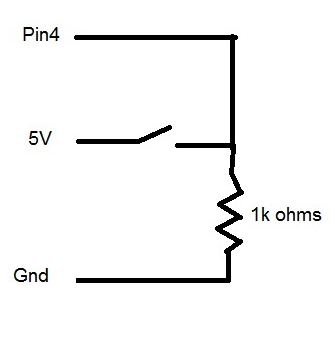
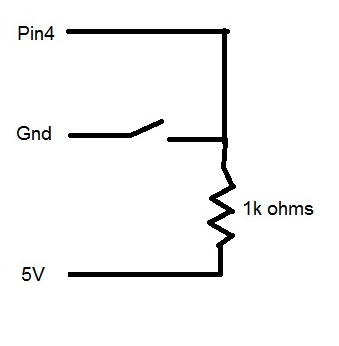
- Pull down Resistors - Momentary Switches

- Potentiometers

- PWM Pulse Width Modulation Dimming

-
Study Examples: -
- Keep your traffic light LEDs wired to Pins 4,5,6
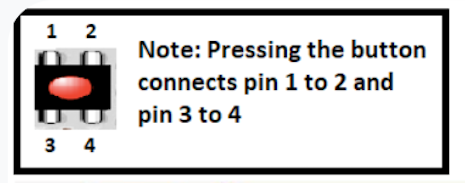
- Wire a momentary switch with Pull Down Resistor to Pin 3
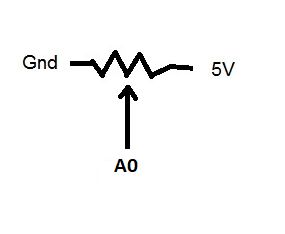
- Wire a potentiometer to Pin A0
Save your traffic light sketch as Switch and Potentiometer
Add code so that:
1) with the switch not pressed the Green LED stays on.
2) pressing the switch switches the signal to yellow for 3 seconds, then Red for 10 seconds.
3) The Potentiometer adjusts the brightness of the Green LEDvoid setup() {
// put your setup code here, to run once
}void loop() {
// put your main code here, to run repeatedly:
} -
-
-
-
...
Assignment 4 - Sound
New parts: Speaker, CdS photoresistor, 10k Resistor (Br, Bl, Or, Gold)
In Class:

Review Resistor Circuits:
Current Limiting, Pull Down, Voltage Divider (Potentiometer), Pull Up
See How a light sensitive resistor can create "Music":
Examples - Basic - AnalogReadSerial -Determine range of A0
TonePitchFollower Code Link
- Adjust to Pin 8 - Adjust to range of A0
* 8-ohm speaker on digital pin 8 and Gnd
* photoresistor on analog 0 to Gnd
* 10K resistor (brown, black, red) on analog 0 to 5v

Assignment:
Write a program (sketch) that plays a song.
Use the following as a guide:


Table of Musical Frequencies Note Frequency Note Frequency Note Frequency C 130.82 C 261.63 C 523.25 C# 138.59 C# 277.18 C# 554.37 D 146.83 D 293.66 D 587.33 D# 155.56 D# 311.13 D# 622.25 E 164.81 E 329.63 E 659.26 F 174.61 F 349.23 F 698.46 F# 185 F# 369.99 F# 739.99 G 196 G 392 G 783.99 G# 207.65 G# 415.3 G# 830.61 A 220 A 440 A 880 A# 233.08 A# 466.16 A# 932.33 B 246.94 B 493.88 B 987.77 
Chromatic Scale - Link -
-
-
-
Applications of MicroControllers:
MicroControllers Measure and ControlA 3D printer:- Measures temperatures of the extruder and print bed- Measures the extreme positions of the X,Y,Z axes (limiting switches)- Controls 4 stepper motors - X,Y,Z and extruder
3-D Printing:


-
Creality CR-6 Max - Print Sample Pawn
Discuss: Pawn and Card-Holder-IOTARotate:
rotate([45,45,45]){
cube([30, 40,30], center = true);
}1) Online OpenSCAD - OpenSCAD Cloud
2) Online OpenSCAD
3) Online OpenSCAD
4) BCS OpenSCAD
5) BCS OpenSCAD with Project Save
OpenSCAD Cheatsheet
- Create object
- Store Code in Arduino Web Editor or Google Drive
- Convert to STL
- Name file: username-title i.e. jrich-castle
- Upload stl file with Google Form like Arduino Code.
- Upload your Openscad code with Google Form like Arduino Code.
- email jrich@blackhawkchristian.org that you have a 3D print job ready
Assignment 6:
Create a small Castle with Towers, Battlements and a Wall.
Max Dimensions: 66mm x 66mm x 66mm (~ 2.5" Cube)


-

Background Colour
Font Face
Font Kerning
Font Size
Image Visibility
Letter Spacing
Line Height
Link Highlight
Text Colour