Arduino Physics
Section outline
-
-
MicroController Project1. Learn About MicroControllers(small computers - Measure and Control)
2. Learn to Control an Arduino MicroController
3. Use an Arduino to Operate a Sumo Wrestling Robot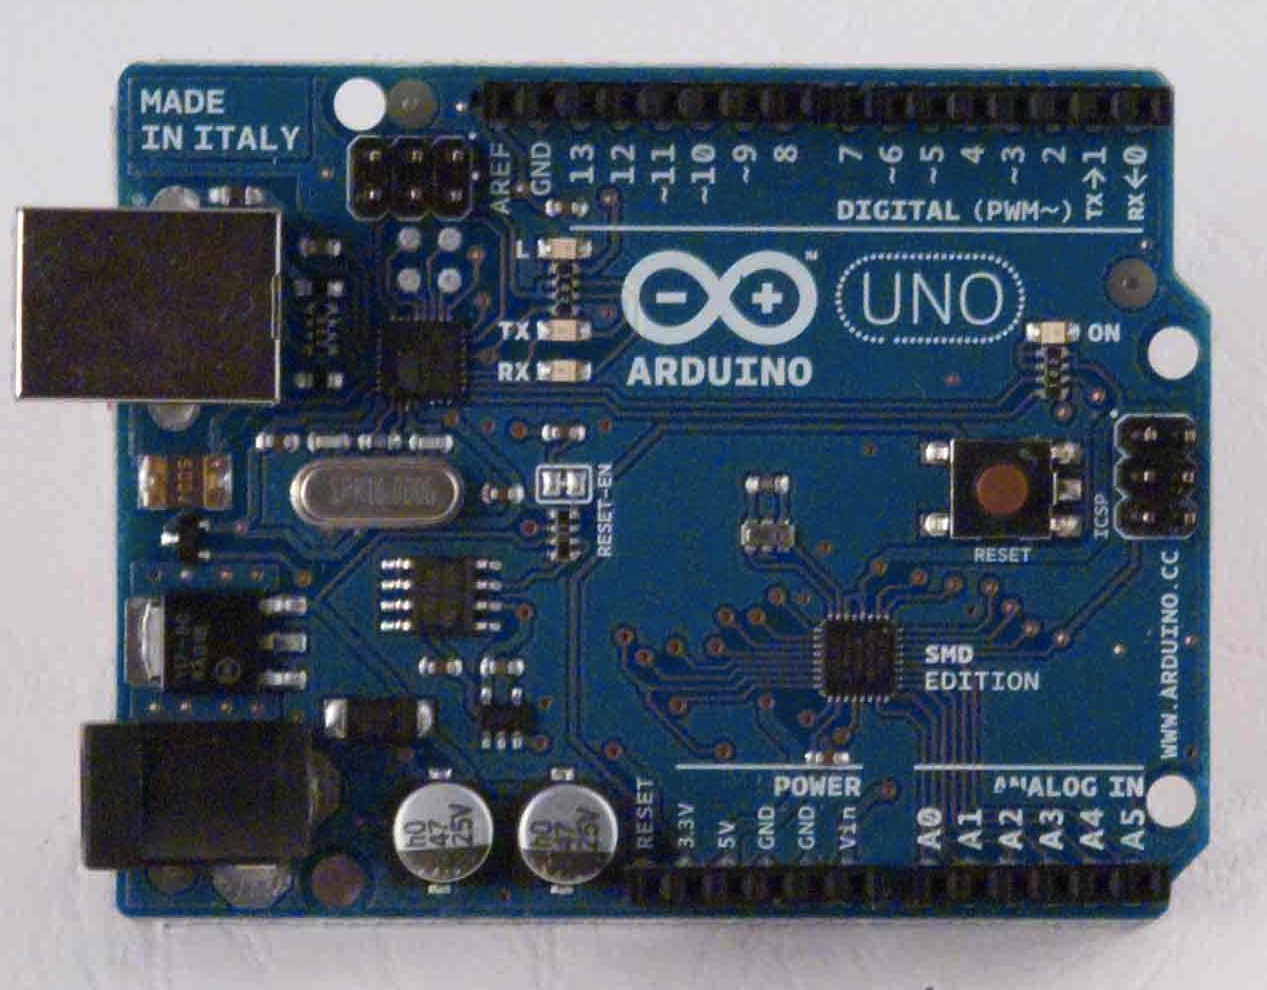
In Class:Comic Strip - Pg 1 - 9Intro to MicroControllers - Mr. Rich
Running your first program (sketch) - Blink
-
Demo: LED Acryllic Sign - Link
Coding Apps:
Duino App
Code Compiler- integrates with Google Drive
save as Arduino.name.program. i.e. Arduino.Joe.Blink
Alternative Coding App:
Assignment #1:
Load Blink
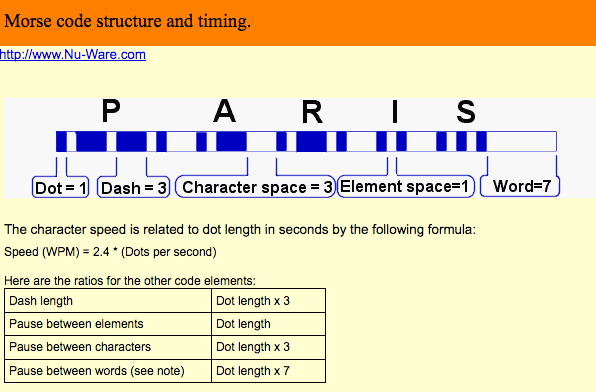
Save Blink as SOSModify the code to blink 3 shorts - 3 longs - 3 shorts (Morse Code for S-O-S)Modify the code to blink Your Name in Morse Codenote: make a short = 200ms -
Assignment:With the Blink Sketch as a pattern, write a sketch that sends morse code to pin 13 (LED) of your first, middle and last name.

-
-
-
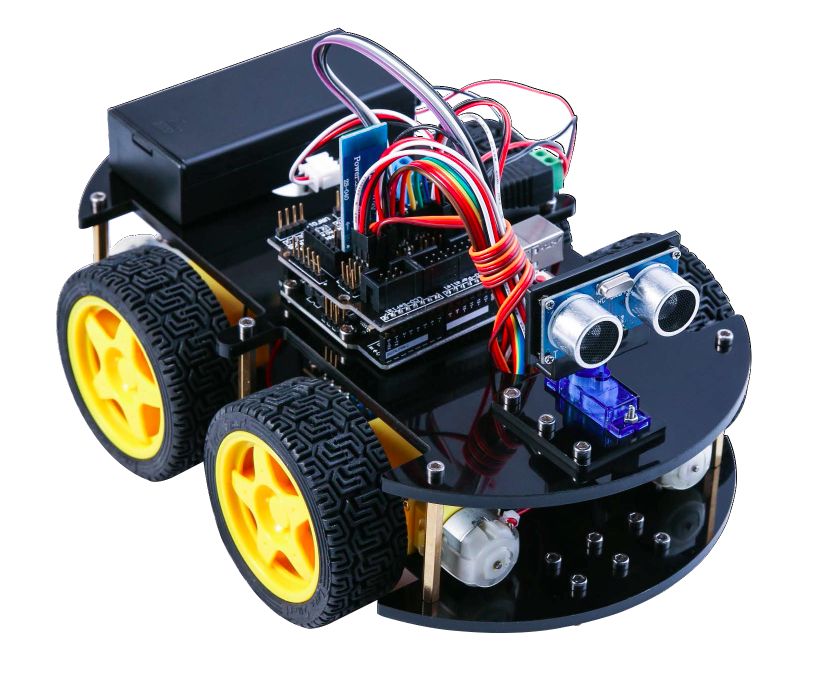
Elegoo Robot - V4

* Arduino Based
* 4 DC Motors with Motor Control Circuit
* 3 IR Trackers
* 1 Ultrasonic Range Finder** contains other functions not used in our projects
Battery Care/Use:
Plug in after each use:
Uploading: Turn Robot Power Off - Upload while on stand with wheels elevated.
Tools: Allen Wrench (Hex Key) , Phillips Screw Driver, Hemostats
Assembly of Elegoo V4
- Verify Parts are tightened
- Remove Top of Frame (6 Bolts) - Don't unplug Motors
- Ultrasonic Mounts tight
- Arduino Mounts tight - remove motor control shield to access bolts
- Battery Mounts tight
- Remove wheels
- Motor Mounts tight
- Reinstall wheels
- Edge Sensor Mounts tight
- Replace Frame top (6 bolts) - tighten top and bottom frame bolts
- Test All Functions:
- Run the Test All V4 program
- Wheels should drive forward, back, right, left
- Ultrasonic sould register distance to closest object
- Edge Sensors (3) should read 1 for black or non-reflective and 0 for white or reflective.
Assignment:
Write a program to:
Drive Forward 5 feet
Turn Right 90 degrees
Back up 4 feet
Turn Left 90 Degrees
Drive Forward 3 Feet
Turn Right ___ Degrees
Drive Forward ____ Back to your starting Point.
Turn to point in the original direction and stop.
Compete for smallest distance from starting point.
Coding Apps:
Duino App
Code Compiler- integrates with Google Drive
save as Arduino.name.program. i.e. Arduino.Joe.Blink
Alternative Coding App:
-


Background Colour
Font Face
Font Kerning
Font Size
Image Visibility
Letter Spacing
Line Height
Link Highlight
Text Colour